A safe industrial yard needs more than bright flood lights: it needs the right illuminance, uniformity, beam distribution, mounting arrangement and controls for each task. You will be able to divide the site, calculate a workable lighting scheme, check it after installation and specify fittings that withstand the site’s environmental, structural and operational demands.
Key takeaways
- Divide the site by task before selecting flood-light layouts.
- Calculate maintained illuminance, quantity and wattage for each area.
- Match beam angle and mounting height to the working plane.
- Check uniformity, vertical visibility and glare after installation.
Divide the Site by Task Before Choosing Flood Lights
An industrial site lighting plan should separate areas by the task performed there, the people and vehicles using them, and the surfaces that must remain visible. Do not use one flood-light layout for the entire property: truck yard lighting needs vehicle-side visibility, while loading bay lighting must reveal pallets, dock edges and lifting activity.
- Draw each zone as a separate calculation area, including its length, width, working plane and viewing directions.
- Mark boundaries between vehicle routes, pedestrian routes, storage, loading and security areas; these boundaries often need different aiming and control groups.
- Record nearby homes, public roads, airports, wildlife areas and property lines before selecting optics, because spill light and glare depend on aiming and beam distribution.
| Zone | Main task | Design emphasis |
|---|---|---|
| Truck yard lighting | Vehicle movement, reversing and coupling | Forward-throw or asymmetric optics; include vertical visibility of vehicle sides |
| Loading bay lighting | Loading, unloading and dock-edge work | Uniform coverage at the dock and vertical light on people, signs and containers |
| Internal roads lighting | Vehicle and pedestrian movement | Long, controlled distribution with minimal glare and spill beyond the road |
| Parking areas | Walking, parking and vehicle recognition | Even coverage, pedestrian visibility and safe transitions to buildings |
| Storage yards | Finding, handling and inspecting materials | Light the storage faces and aisles, not only the ground |
| Perimeter zones | Boundary observation and intrusion detection | Aim inward; coordinate with cameras and avoid bright backgrounds |
| Stairs and security points | Foot traffic, identity checks and surveillance | Short-range, low-glare coverage on faces, steps and access controls |
Calculate Maintained Illuminance, Quantity and Wattage
Use this lux calculation:
Number of flood lights = (target maintained illuminance × area) ÷ (initial lumens per flood light × utilisation factor × maintenance factor).
The result must be rounded up. For example, a 1,000 m² yard requiring 20 lux, using 30,000-lumen flood lights, a utilisation factor of 0.60 and a maintenance factor of 0.80, needs 1.39, so specify at least two fittings before checking uniformity and glare.
- Set the maintained illuminance from the project brief, client specification or EN 12464-2 schedule. A brief might specify 10 lux for vehicle movement, 20 lux for pedestrian movement, 50 lux for loading work, 100 lux for inspection work and a separate security-observation value. Do not treat these figures as universal.
- Calculate each zone separately using its actual area, mounting layout and photometric distribution.
- Include a maintenance factor for LED lumen depreciation, dirt on the lens, ambient conditions and the planned cleaning interval. A high initial-lumen fitting fails the design if its useful light misses the task plane.
- Calculate wattage after selecting lumen output: luminaire watts = required lumens per fitting ÷ tested lumens per watt. Use the complete flood-light rating, including driver consumption, rather than LED chip output.
Check vertical illuminance for people, vehicle sides, signs and containers, not only horizontal lux. Recalculate if the fitting’s beam pattern changes, because equal lumens can produce different coverage, spill light and uniformity.
Match Mounting Height, Beam Angle and Position to the Working Plane
A fixture covers the working plane only when its flood-light mounting height, beam spread and aiming point match the area below. Raising the fixture enlarges the footprint and reduces harsh shadows, but illuminance falls with distance; you may need higher lumen output or tighter optics to maintain the target level.
| Beam option | Coverage and shadows | Glare and wattage implication |
|---|---|---|
| Narrow beam | Long throw, concentrated coverage and stronger contrast; useful for distant roads or high-mast applications | More aiming precision, higher glare risk if viewed directly, and less wattage wasted outside the task area |
| Medium beam | Balanced footprint with moderate shadow reduction; suitable for yards and loading approaches | A practical compromise between fixture count, aiming tolerance and wattage |
| Wide beam | Broad close-range coverage with softer transitions; useful for open yards and façades | More spill and potential glare, with higher wattage or more fixtures needed at greater height |
Place fixtures beside or slightly behind the task, then aim across the working plane rather than toward drivers, operators or security cameras. Opposing positions reduce shadows beneath trucks and equipment; a single low-side fixture creates long dark zones behind objects.
Choose asymmetric or forward-throw optics for roads and property edges to limit light behind the pole. Do not treat a low-uplight BUG rating as proof of comfortable viewing: shielding, aiming angle, mounting height, background brightness and observer location still control practical glare.
Before fixing the bracket, check:
- The beam reaches the far edge without overshooting the boundary.
- The pole and arm support projected area, weight and wind moment.
- The mounting height leaves maintenance access and avoids obstructions.
Verify Uniformity, Vertical Visibility and Glare After Installation
Prove the installation with a night-time field survey, not a visual walk-through. Use a calibrated meter on the planned lux meter grid and compare readings with the project’s maintained illuminance and lighting uniformity criteria, using the specified maintenance factor rather than the flood light’s initial lumen claim.
Measure more than the horizontal working plane:
- Record average and minimum horizontal illuminance across each yard, road, loading bay and pedestrian route. Calculate uniformity as minimum illuminance divided by average illuminance.
- Measure vertical illuminance on planes facing approaching drivers, pedestrians, signs, containers and security cameras. Repeat the readings in the important viewing directions; a bright ground surface cannot prove that a person’s face or a vehicle side is visible.
- Check transitions between lit zones, corners, behind containers and beneath parked trailers. These locations expose dark patches that an average lux figure hides.
- Walk and drive the site from operator and camera viewpoints. Note direct views of LED emitters, reflected glare from metal surfaces and disability glare at junctions.
Use the luminaire’s BUG rating to screen backlight, uplight and glare, but do not treat it as an installation pass. A low-uplight rating cannot compensate for poor aiming, low mounting, inadequate shielding or a bright emitter in the driver’s line of sight.
For cameras, review recorded footage at the actual frame rate and shutter settings. Request driver temporal-light-modulation data and check for banding, rolling-shutter lines or flicker. Re-aim, shield, dim or replace fittings that fail any visibility or camera test.
Specify the Outdoor Flood-Light System for Real Site Conditions
Put acceptance criteria in the purchase order, not just a wattage and lumen figure. Require maintained illuminance and uniformity at the task plane, with stated lumen-maintenance, dirt, ambient-temperature and maintenance factors; initial lumens alone can produce bright fittings and dark work areas.
- Specify the enclosure and exposure: IP66 means dust-tight and protected against powerful water jets; IP67 adds temporary-immersion protection, but does not replace IP66 hose-down performance. Select an IK08 impact rating for ordinary exposure and an IK10 impact rating near forklifts, thrown materials or vandalism.
- State the surge design: line-to-line and line-to-ground protection, grounding arrangement, surge category, coordination with the service-panel SPD, and whether the luminaire SPD must be replaceable or external. A fixture’s advertised kV value is not a complete lightning or switching-surge design.
- Give the pole and bracket design wind loads, mounting height, outreach, foundation and anchor-bolt drawings, corrosion protection, cable-entry method, earthing point and safe maintenance access. Confirm structural calculations before pouring foundations.
- For classified areas, name the Class, Division or Zone, gas or dust group and temperature class. Demand the matching hazardous-location listing; IP66 or IP67 alone does not approve a luminaire for explosive atmospheres.
- Define the control sequence: photocell, astronomical timer, occupancy sensor or network control; fail-on or fail-off behaviour; manual override; sensor cleaning and commissioning; and operation after communication or sensor failure.
During commissioning, verify aiming, torque, insulation, earth continuity, control response and measured lux. Vedant Lights India Pvt. Ltd.|08048034087 can help document these checks when supplying fittings and installation support.
Related product
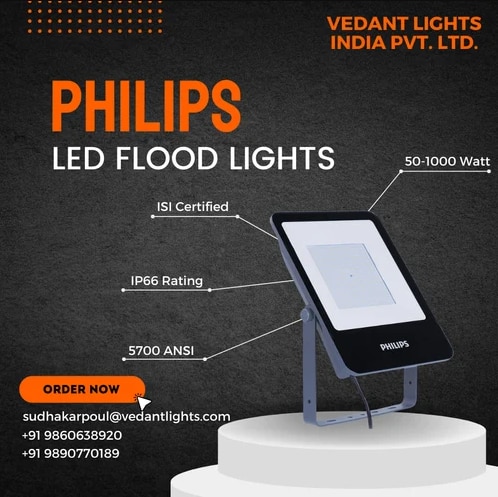 | LED Flood Lights Philips Flood Lights - Brilliant Illumination for Every Space Introducing Philips Flood Lights, the epitome of energy-efficient and reliable outdoor... View product → |
Frequently asked questions
How should you divide an industrial site before choosing flood lights?
Separate the site by task, users and surfaces requiring visibility. Treat truck yards, loading bays, pedestrian routes, parking areas and work zones as distinct lighting areas.
How do you calculate flood-light quantity and wattage?
Set the required maintained illuminance for each task area, calculate the total lumens needed for its surface, then account for luminaire output, maintenance factors and spacing before selecting wattage.
How do mounting height and beam angle affect outdoor flood-light performance?
Match the mounting height and beam angle to the working plane. Narrow beams suit longer throws, while wider beams cover broad areas at shorter distances; incorrect selection creates dark patches or excessive glare.
What should you verify after installing industrial flood lights?
Measure illumination across the working area and check uniformity, vertical visibility, shadows, spill light and glare from vehicle and pedestrian viewpoints.